Summary: Your search to safely attach an OST file to a new profile solution is here. We have also discussed convenient ways to export damaged, orphaned, or inaccessible OST files to PST. Give a few minutes to find valuable solutions.
When it comes to using a safe platform to manage everyday emails, contacts, notes, and events, the name Outlook for Windows comes first to mind. The Microsoft product is trusted globally by professional and personal users. Robust security and smart features make it one of the best email clients. Outlook for Windows supports two types of files, OST and PST. When you connect Outlook with Office 365 or Exchange Online, Outlook saves data locally in an OST file extension. OST files offer an uninterrupted workflow.
Is It Possible to Attach the OST File to a New Profile?
To learn the answer to this question, it is essential to understand the function of an OST file.
OST stands for Offline Storage Table, which can store emails, notes, journals, contacts, events, and various properties. It is created when your Outlook profile is configured with an IMAP, MS 365, Exchange, or Outlook.com account in Cached Exchange Mode. You can say that Outlook by default saves its data in OST when it connects with Exchange.
The biggest advantage of OST files is that they offer offline access to data.
The file is also encrypted by default with an MAPIEntryID GUID key. In this situation, Outlook restricts users from accessing OST files or importing them into other Outlook profiles, accounts, and systems. It means an orphaned OST file cannot be attached to a new Outlook profile.
The best thing you can do is to convert OST into an Outlook-supported file. You can perform manual conversion or take help from a third-party application like the expert OST to PST conversion tool. This is one of the best applications to move OST files into Outlook PST format within a few clicks. You don’t need to be technically competent to run this conversion program. It is user-friendly and reliable.
Also Read: How to Delete an OST File
What is the Way to Attach an OST File to a New Profile?
Here are the steps to follow.
Step 1: Make Your System Ready for This Procedure:
This is the first move where we recommend that you turn off all the apps you are running currently in the system and save your work to prevent data loss. Create a backup of the target OST file to avoid data loss in the event of the failure of the conversion of accurate data.
Access the OST file from its default location, which can vary based on the Windows and Outlook versions you use. The default location link may be:
C:/Users/Your_Username/AppData/Local/Microsoft/OutlookCopy Code
Once you locate the target OST file, copy its data to save it in your preferred folder or drive.
Step 2: Developing a New Profile in Outlook
In the next step, create a new profile in Outlook with these simple steps.
- If Outlook is open, turn it off and navigate Control Panel.
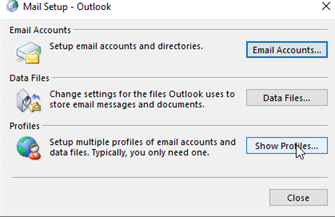
- After that, locate User Accounts > Mail (32-bit).
- Press Show Profiles in the Mail Setup window.
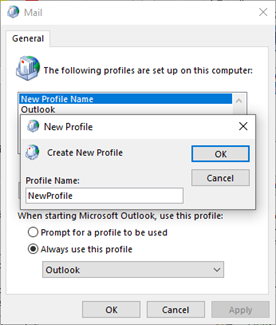
- Select Add and give a unique name to your profile, then press OK.
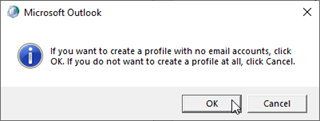
- In the email configuration window, press Cancel and then OK. Your profile will be ready with no email account. You can now attach the target OST file to the profile.
- After that, get back to the Mail Setup window. Select the old profile and then press the Remove button.
- As the prompt appears, press Yes.
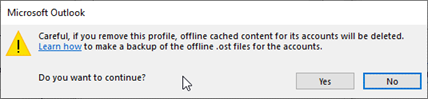
Note: As you remove the old profile, the associated OST file of the profile will automatically be removed.
Step 3: Attach the OST File to the New Profile
As mentioned, OST files are encrypted, preventing you from accessing an OST file in another profile. In this case, signing in to your new profile using the same email account that you used for the previous Outlook profile will allow you to recreate an OST and restore items from the old OST file into a new OST file. Follow the given steps carefully.
- Access Outlook, which will prompt you to access using your email account.
- Provide your email credentials and access to the new profile. Microsoft Outlook will automatically create a new OST file.
- This process will attach your new OST file to the new profile, and Outlook will synchronize with Exchange to download all data in the OST file.
Step 4: Check the OST File Created in Your New Outlook Profile
At this time, confirm the attached OST file quality. For this,
- Access Outlook and the new profile.
- Go through the data, including emails, contacts, and calendars, for quality and accessibility.
- If the file quality is intact, it means the process of connecting an OST file with a new profile has been successfully achieved.
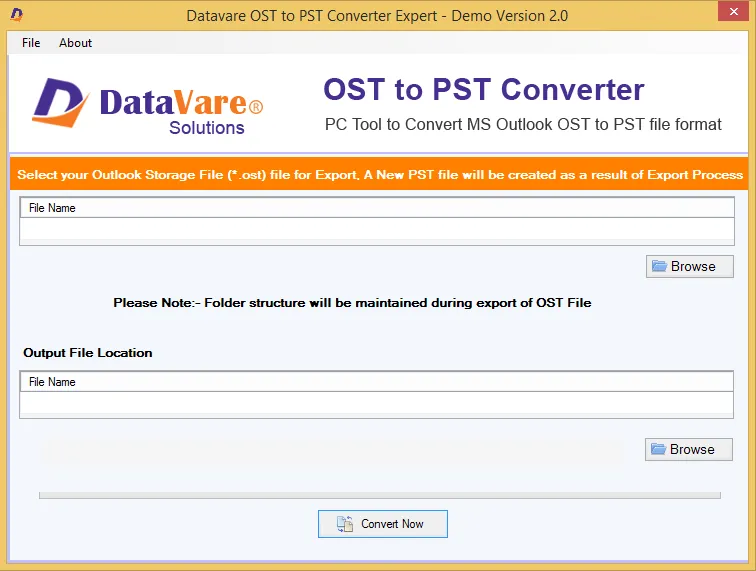
Some users have complained about the quality of the attached OST file to a new profile, like missing data and incomplete attachments. If you have noticed this problem, the best thing is to convert orphaned OST files to PST. For this, a conversion tool is the best solution. Datavare OST to PST Converter is one of the most valuable applications to export OST mailbox file into PST within a few clicks. The conversion program keeps mailbox data intact and organized.
Conclusion
Attaching an OST file to a new profile is a requirement when you upgrade Outlook version. Sometimes, existing profile issues encourage users to create a new profile. Whatever the reason for attaching an OST file to a new profile, you have solutions to apply. We hope that the suggested solutions will work for you.